Before starting, check that the system time is up to date to avoid connection failure problems.
Download and Installation
For Intel processor Mac devices, please download the x64 version by clicking here.
For Apple Silicon (M1/M2/M3) Mac devices, please download the arm64 version by clicking here.
Additionally, for devices with macOS versions before 10.15, please download the compatible version by clicking here.
Once downloaded, open the Cloudss_xxxx.dmg file and drag it to the Applications folder.
If you encounter a "Cloudss is damaged" prompt, open the macOS Terminal program and enter the following command, then reopen:
sudo xattr -r -d com.apple.quarantine /Applications/Cloudss.app
If you see a prompt saying "cannot open the application because it is from an unidentified developer," please refer to Apple's official help documentation.
Software Use
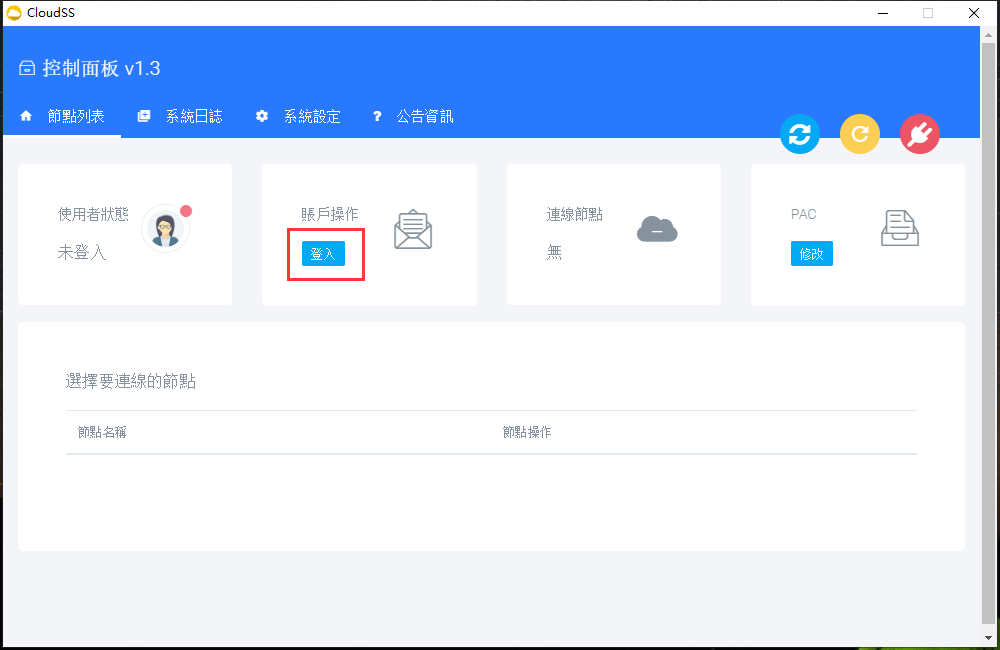
Open the App from Applications. Log in with your account on our website.
If you are prompted with "Can't open the app because it's from an unknown developer," please refer to the official Apple Help documentation.
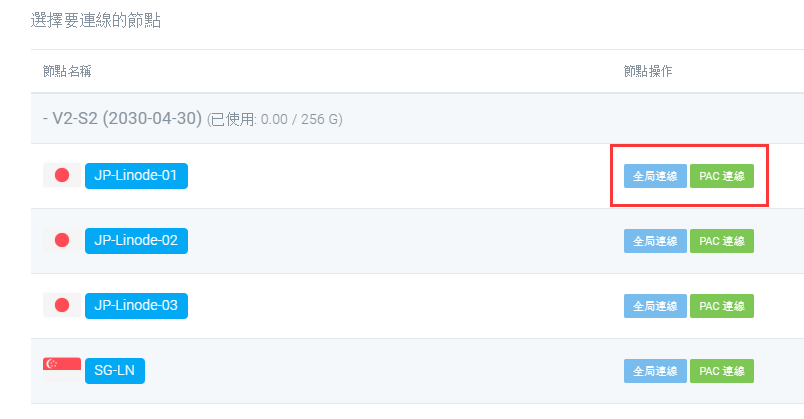
Select the server node and click "Global Mode Connect" or "PAC Mode Connect" to start using it. No additional action is required, after selecting the mode connection, you can immediately open the browser to access the website you want!
- Global Mode: All website visits through the browser will go through the proxy ( the node you choosed).
- PAC Mode: All domestic access will remain the same. Only the sites listed on the PAC file will be accessed via proxy. This will save you a lot of data usage.
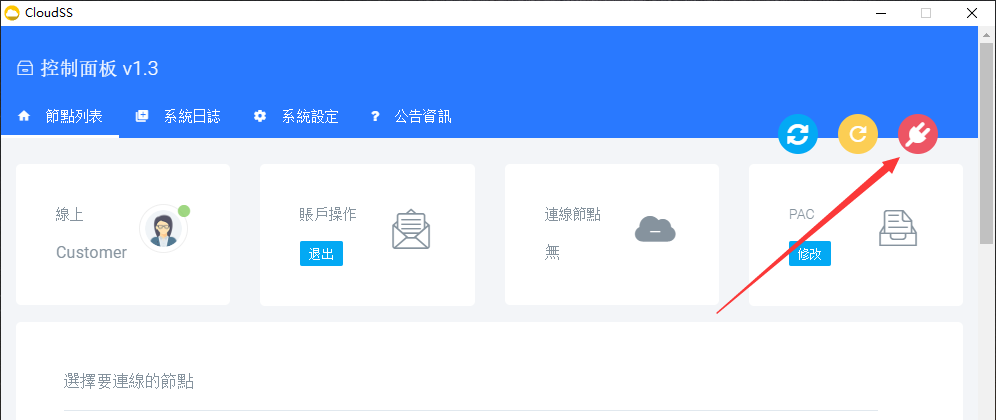
When you don't need it, click the third button in the upper right to disconnect (the front buttons are "Refresh Account Information" and "Refresh PAC Configuration" respectively). When you want to update to the latest node configuration, you can click the blue button to "Refresh Account Information" .