This guide will help you download, install, log in, and configure Cloudss on macOS.
1. Download and Install Cloudss Client (macOS)
-
After downloading, double-click the
.dmgfile. -
Drag
Cloudss.appinto the Applications folder.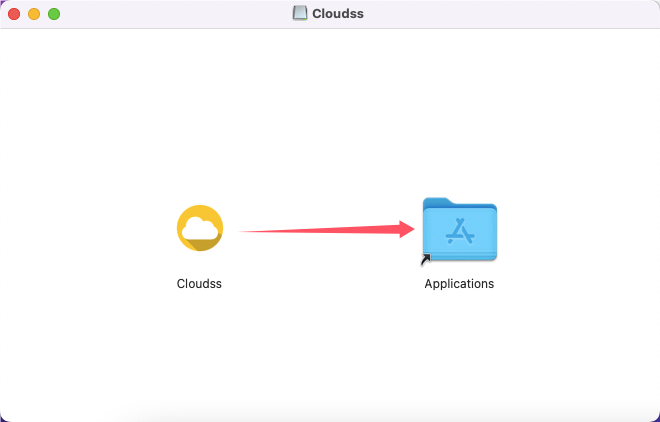
-
Open Cloudss from Launchpad.
If macOS displays a message such as "Cannot verify developer" or "App from an unidentified developer", please follow these steps:
- Close the warning window.
- Go to System Settings → Privacy & Security.
- Locate the blocked Cloudss application.
- Click Open Anyway.
- Launch Cloudss again.
- Open Finder.
- Locate
Cloudss.app. - Right-click and select Open.
- Click Open again when prompted.
2. Log In to Your Cloudss Account
-
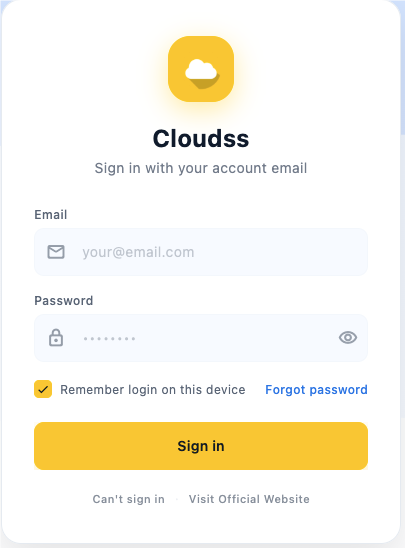
Launch the Cloudss application.
-
Enter the Email Address and Password associated with your account, then click Login.
If the login page remains blank or continuously loads, follow the troubleshooting steps below.
Troubleshooting Login Page Issues
- Locate the Cloudss icon in the macOS menu bar.
- Right-click the icon and select Quit.
- Open Launchpad.
- Launch Terminal.
- Run the following command:
sudo xattr -r -d com.apple.quarantine /Applications/Cloudss.app- Press Enter.
- Enter your Mac login password.
- Press Enter again to confirm.
- Reopen Cloudss.
The login page should now load normally.
3. Select a Server Node and Enable Proxy
- Click Node Selection.
- Select any available server node.
- Return to the home screen.
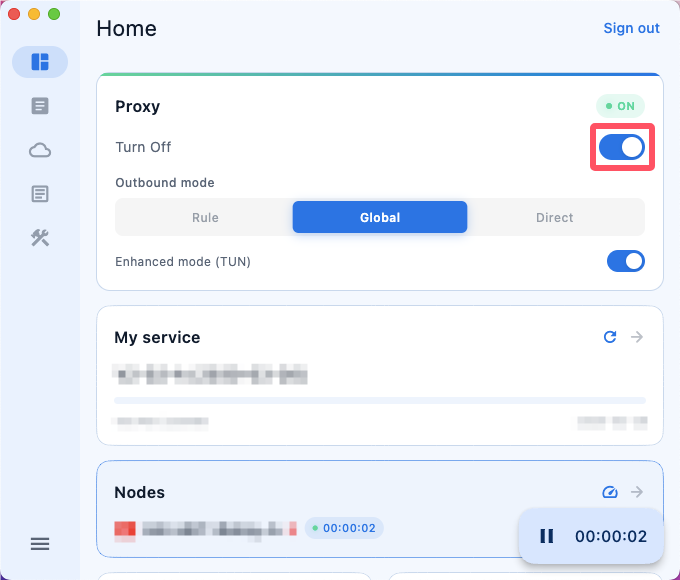
- Enable the switch under Proxy Control.
- Wait for the connection to be established.
Once connected, you can browse the internet normally.

4. Refresh Plan and Node Information
We recommend refreshing your service information after:
- Purchasing a new plan
- Renewing your subscription
- Updating node configurations
- Experiencing missing or outdated nodes
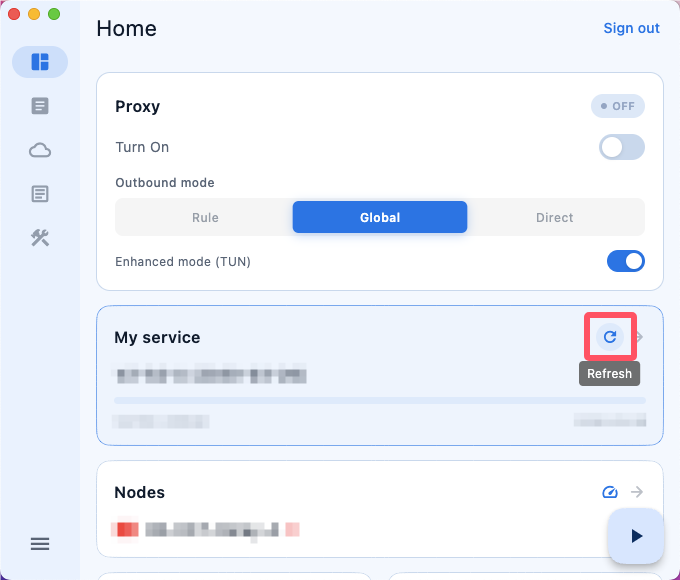
On the home screen, locate the My Service section and click Refresh.
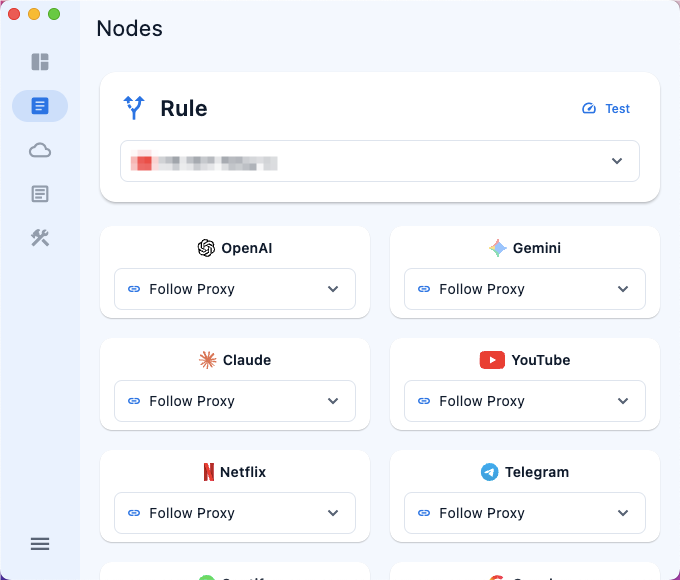
5. Rule Mode & Application Routing
Cloudss supports Rule Mode, allowing different applications to use different server nodes.
- Switch to Rule Mode.
- Open Node Selection.
- Assign specific nodes to selected applications.
6. Download Older Versions (Optional)
- Intel-based Macs (x64)
Download Cloudss v1.4.0 (x64) - Apple Silicon Macs (M1 / M2 / M3 / M4)
Download Cloudss v1.4.0 (ARM64) - macOS Earlier Than 10.15
Download Compatible Version
Frequently Asked Questions (FAQ)
Q1: macOS says Cloudss cannot be opened because the developer cannot be verified.
This is a standard macOS security feature. Go to System Settings → Privacy & Security and select Open Anyway.
Q2: The login page is blank or stuck loading.
Run the following command in Terminal:
sudo xattr -r -d com.apple.quarantine /Applications/Cloudss.appThen restart Cloudss.
Q3: No nodes appear after logging in.
Verify that your subscription is active, then click My Service → Refresh.
Q4: The proxy is enabled but internet access is unavailable.
- Switch to another node.
- Disable and re-enable the proxy.
- Restart Cloudss.
- Check firewall or security software settings.
Q5: My traffic quota or plan information is not updated.
Refresh your service information or log out and log back in.
Q6: Node changes do not take effect immediately.
Disable and re-enable the proxy or restart the application.
Q7: How do I know whether my Mac is Intel or Apple Silicon?
Click the Apple menu → About This Mac. If the processor shows Intel, download the x64 version. If it shows Apple M1, M2, M3, or M4, download the ARM64 version.